French Toast Bake

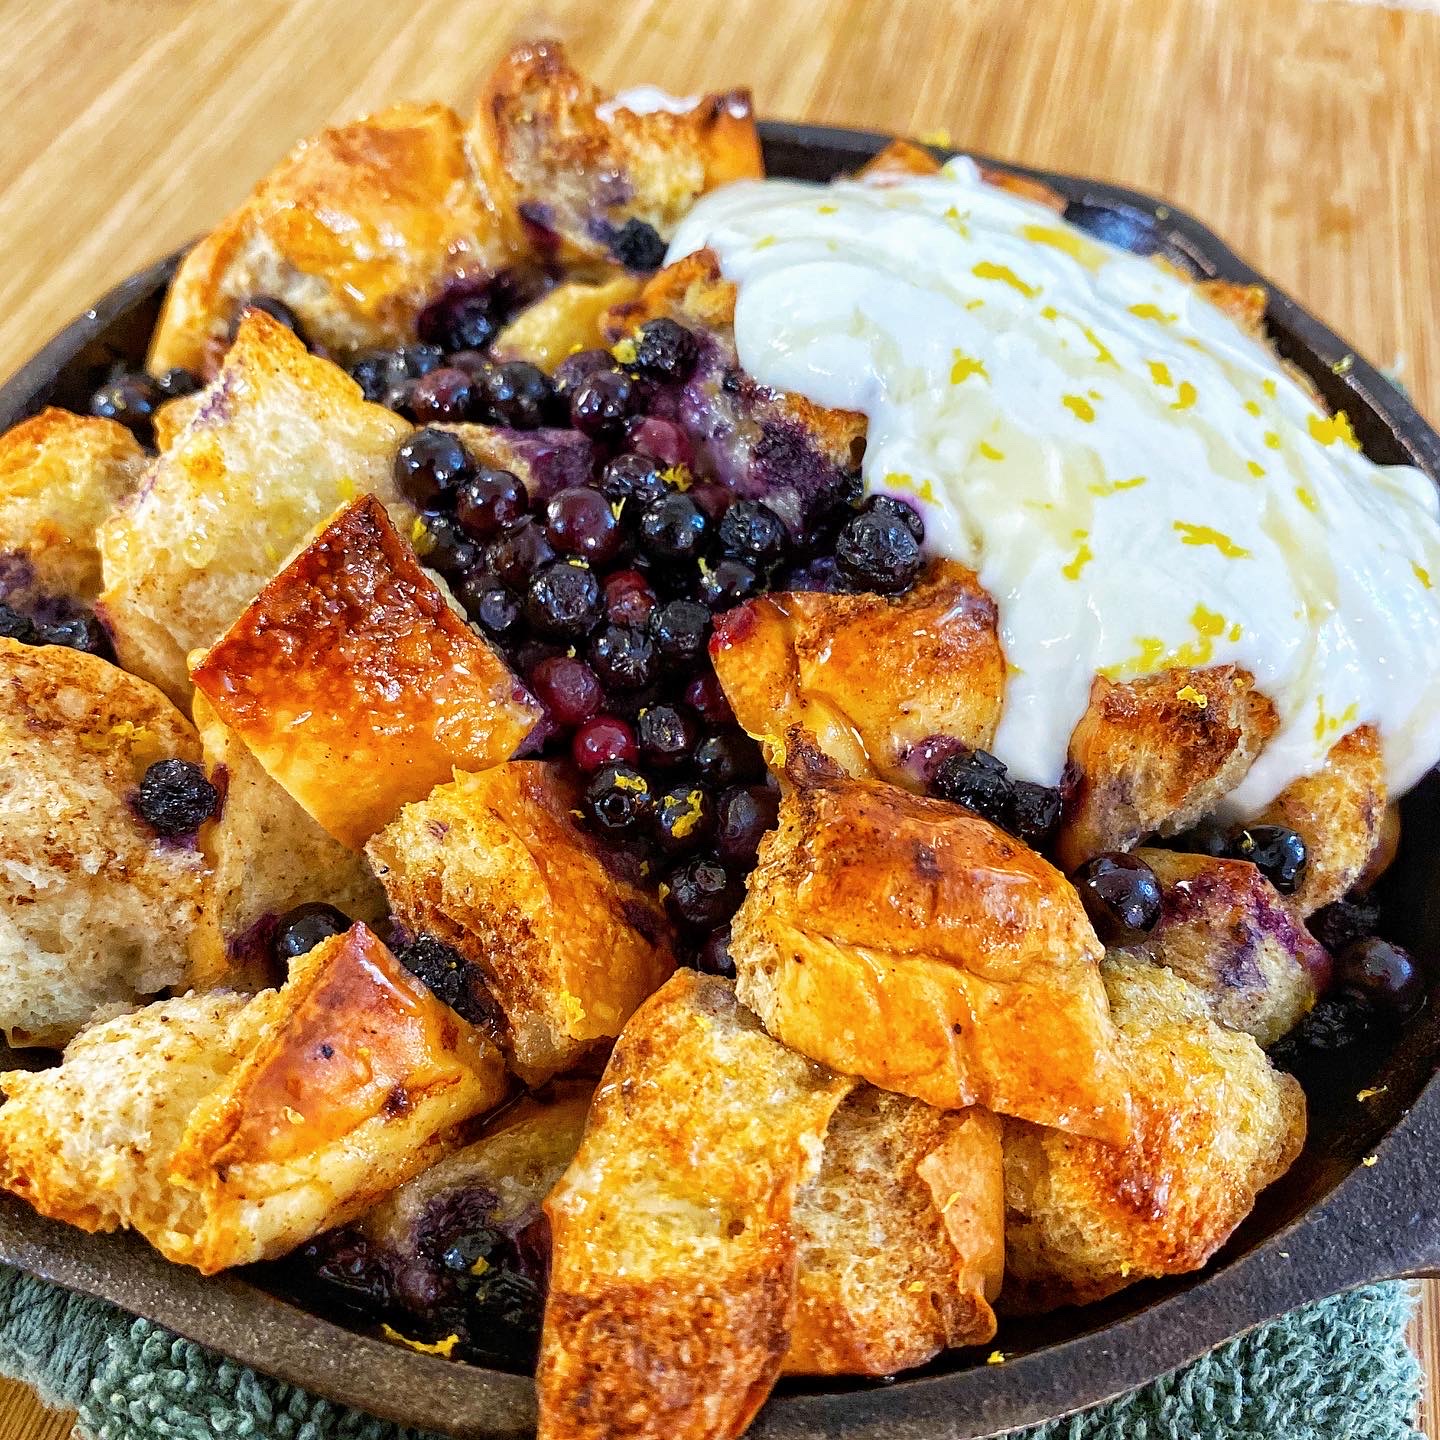
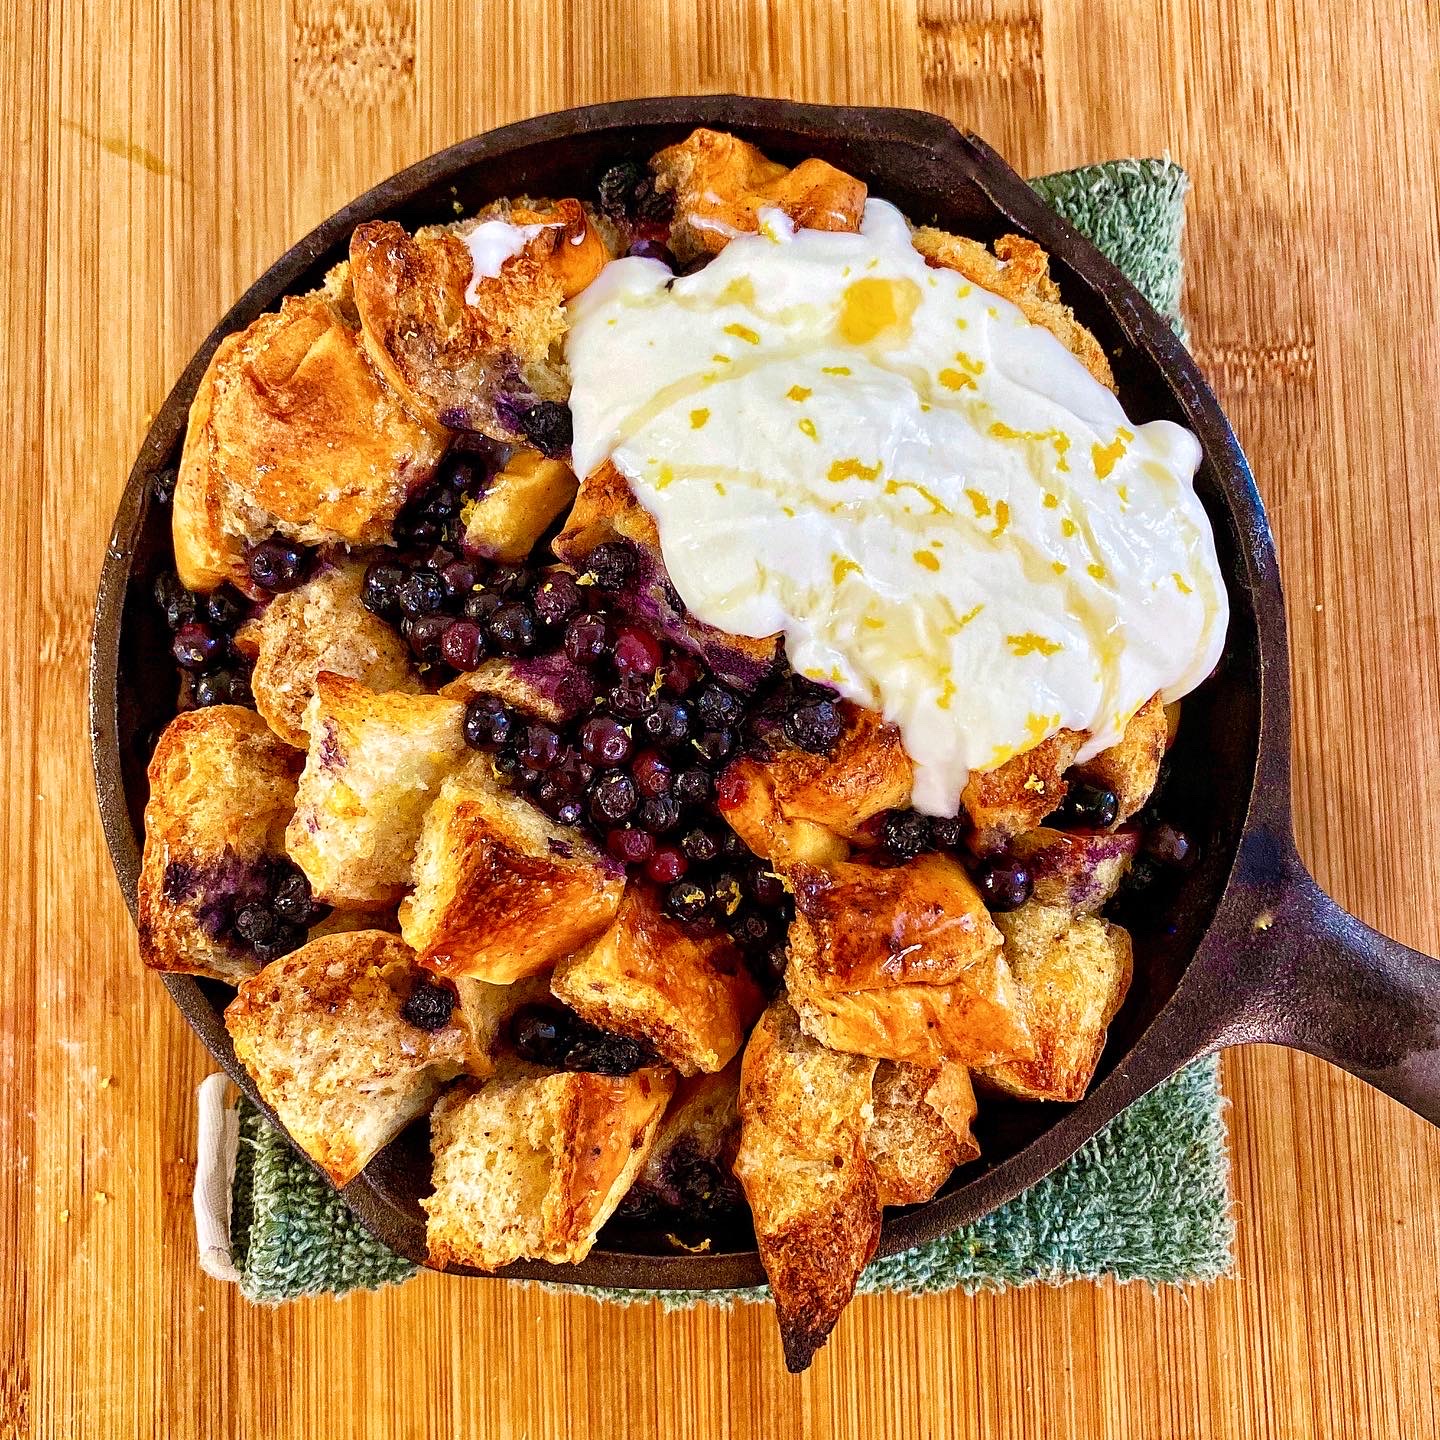
If you bake this in a mini cast iron dish it makes it fancier.

Fun Fact: One of the earliest versions of French toast can be traced back to the Roman Empire.

This dish was created during one of those mornings when I woke up and decided I wanted to eat dessert for breakfast – and because I’m an adult, no one could tell me not to. Also me being lazy played a big role in this so I used whatever I had laying around, including some stale brioche buns, which actually helped absorb the custard mixture so lets just pretend I did it on purpose. Also because I put berries on this, this counts as a healthy fruit dish.

I made this in a mini 3″ cast iron pan, so that’s what the measurements are based on. If you have a larger pan, feel free to scale up the recipe. Remember to scale up by pan area, not just diameter. Yeah, sorry, you have to do some math to make this dish. Additionally, I think a lot of different flavor combinations would be great to try so feel free to experiment.

Tips and tricks:

  • Stale bread is great to use as it will soak up the custard better and maintain some structure. Its a great way to use up some bread that might be too hard to eat normally.
  • The toppings are pretty open – feel free to use whatever you have around. Lemon + blueberries is a good combo but any fresh or frozen fruit would work great.

Ingredients

  • 2 buns (brioche, kaiser, etc.) or equivalent amount of bread
  • Milk
  • Eggs
  • Sugar
  • Salt
  • Nutmeg or cinnamon (optional)
  • Lemon- Blueberry Compote:
    • Blueberries (fresh or frozen, thawed and drained)
    • Lemon juice
    • Lemon Zest
    • Sugar or Honey
    • Nutmeg
  • Topping:
    • Greek Yogurt
    • Honey
    • Lemon Zest
    • Mint

Get Cooking

  1. This recipe is what I used to bake in a 3″ cast iron skillet. Preheat the oven to 375F.
  2. Mix the ingredients for your fruit compote. Adjust to taste and let sit while you prepare the rest of the dish.
  3. Whisk the milk, eggs, sugar, and a small pinch of salt. Add nutmeg or cinnamon (optional). Cut the bread into small cubes and mix into the custard. Let it soak for a few minutes and make sure all the bread is saturated, make additional custard if needed.
  4. In your small cast iron or cooking dish, heat it up on the stove over medium heat. Place in a knob of butter and let it melt. Put in the bread-custard mixture and let it brown slightly on the bottom, about 5ish minutes.
  5. Place a few blueberries and small pats of butter on top and place in the oven for 25-35 minutes or until browned on top and cooked through.
  6. Pull the pan out of the oven, place 1/3 of the blueberry compote on top, and then put back in the oven for ~ 5 minutes.
  7. Remove the French toast bake and top with the remaining compote and the greek yogurt topping. Additionally (optionally) top with lemon zest, honey drizzle, or mint.

Apple Galette

Because Apple Galette sounds much fancier than Apple Pie.


Fun Fact: According to common consensus, Apple Pie was actually invented in England over 600 years ago.

I’ve recently started to make an effort to bake more and this works great especially around the holidays since baked goods is basically its own food group. While looking for something new I decided to make this galette as an alternative to pie and now I am on the galette bandwagon.

Compared to a traditional pie, this has a much better crust to filling ratio and is light enough to not overload you after a great meal. Plus saying that you ‘made a galette’ sounds much fancier than making a boring ol’ apple pie.

I used Alison Roman’s recipe for both the crust (click here) and the filling (click here) and it was super easy to make in the morning before the other main dishes. To help save time, feel free to make the dough the day before and keep in the fridge. I think the next time I make this, I may try to whip up a simple oat crumble on top to give some extra texture.

THE Brownies

Brownies are good. ‘Nuff said.

Fun Fact: Chocolate is made from cacao which is the seed of a fruit tree so this counts for your daily fruit serving (first part true, second part questionable).

This brownie recipe is my ideal brownie – fudg-ey, chewy, chocolatey. Cake-y brownies are not invited to this party. This is one of the first recipes I developed on my own and its taken a few iterations to get to the current state and I’m always looking to improve.

Some of the key things I like about this is the ability to control the type of chocolate; I like to use a mix of dark and milk to add more depth to the flavor profile. Additionally, chopping the chocolate gives a non-uniform size and adds variety to each bite – you might get a huge pocket of melted chocolate or a few small pieces mixed together.

Tips and tricks:

  • USE parchment paper if you want your life to be easy and to make removing these brownies not a terrible time. Using parchment paper + nonstick spray is extra credit.
  • Feel free to experiment with the types and bitterness of chocolate. I always end up changing my mixes depending on how I feel and what I find. This is the one ingredient I usually splurge on (if you can) since its the dominant flavor profile. The dark chocolate (70% cocoa) really helps bring depth and avoid too much sweetness.
  • Don’t overtake these. All ovens are a bit different, and I would err on the side of under-baking than overtaking to make sure they remain chewy and fudge. The CDC says it’s okay to eat a little raw batter during mixing. (Disclosure: not actual CDC advice)

Ingredients

  • 5oz chocolate, chopped for mix-in (I use a mix of 70% cocoa and 40% cocoa)
  • 3oz chocolate, chopped (for topping)
  • 1 1/8 c. butter
  • 3/4 c. cocoa powder
  • 1.5 c. granulated sugar
  • 3/4 c. light brown sugar
  • 4 eggs + 1 egg yolk
  • 3 tsp. vanilla extract
  • 1 1/8 c. AP flour
  • 1 tsp. kosher salt
  • 1.5 c. chocolate chips or chopped chocolate for melting
  • 1.5 tsp espresso powder
  • 2 tsp molases (optional)

Get Cooking

  1. Preheat oven to 350F. Line a 13×9 metal baking dish with parchment paper and some baking spray for good luck.
  2. Heat the butter in a saucepan over medium heat until the milk solids have browned and turned a golden color. It should smell nutty, butterscotch-y, and all around really good. Once the butter is melted, remove from heat and whisk in the cocoa powder until smooth. Set aside to let cool slightly.
  3. Combine the granulated and brown sugar in a bowl and whisk to combine. When the butter has cooled slightly, whisk into the sugar mixture until fully combined. I use an electric mixer because I’m lazy but don’t beat too much air into it.
  4. In a bowl, melt ~4 oz of the chocolate chips and add that to the butter-sugar mixture. Additionally, whisk in the eggs + yolk one at a time until fully incorporated. Add in the vanilla extract, espresso powder, and molasses and beat to combine.
  5. Mix in the flour in small batches and stir with a spatula/ wooden spoon. At this point, add in the remainder of the chocolate chips and the 5 oz. of chopped chocolate. The batter should be thiccc (with at least 2-4 c’s).
  6. Pour the batter into the baking dish and spread evenly. Top the batter with the remaining 3-4 oz. chopped chocolate.
  7. Bake 30-35 minutes or until just done or slightly under-baked. (All ovens are a bit different so just keep an eye on it). To test- use a toothpick into the center that comes out without too many crumbs. There may be melted chocolate so poke a few places.
  8. Pull the pan out and let cool on a wire rack for 20-30 minutes until about room temp. (hardest part). At this point, use the parchment paper (you used it right??) to remove the brownie sheet and let cool even more to allow to solidify. Make sure its completely cool before cutting.